Getting started with the Logistra integration
How to connect Telaris to Cargonizer and set up what is needed to use the freight integration. The setup is done by an administrator together with Telaris.
TABLE OF CONTENTS
- Prerequisites
- Connect to Cargonizer
- Printers
- Tracking links
- Consignments from picking lists
- Automatic EDI transfer
Prerequisites
Before you start you need an account with Logistra (Cargonizer) with at least one carrier agreement, and you need the API key (Client Token) and client number (Client Number) from Cargonizer. Note that the client number is called "ID" in Cargonizer.
Connect to Cargonizer
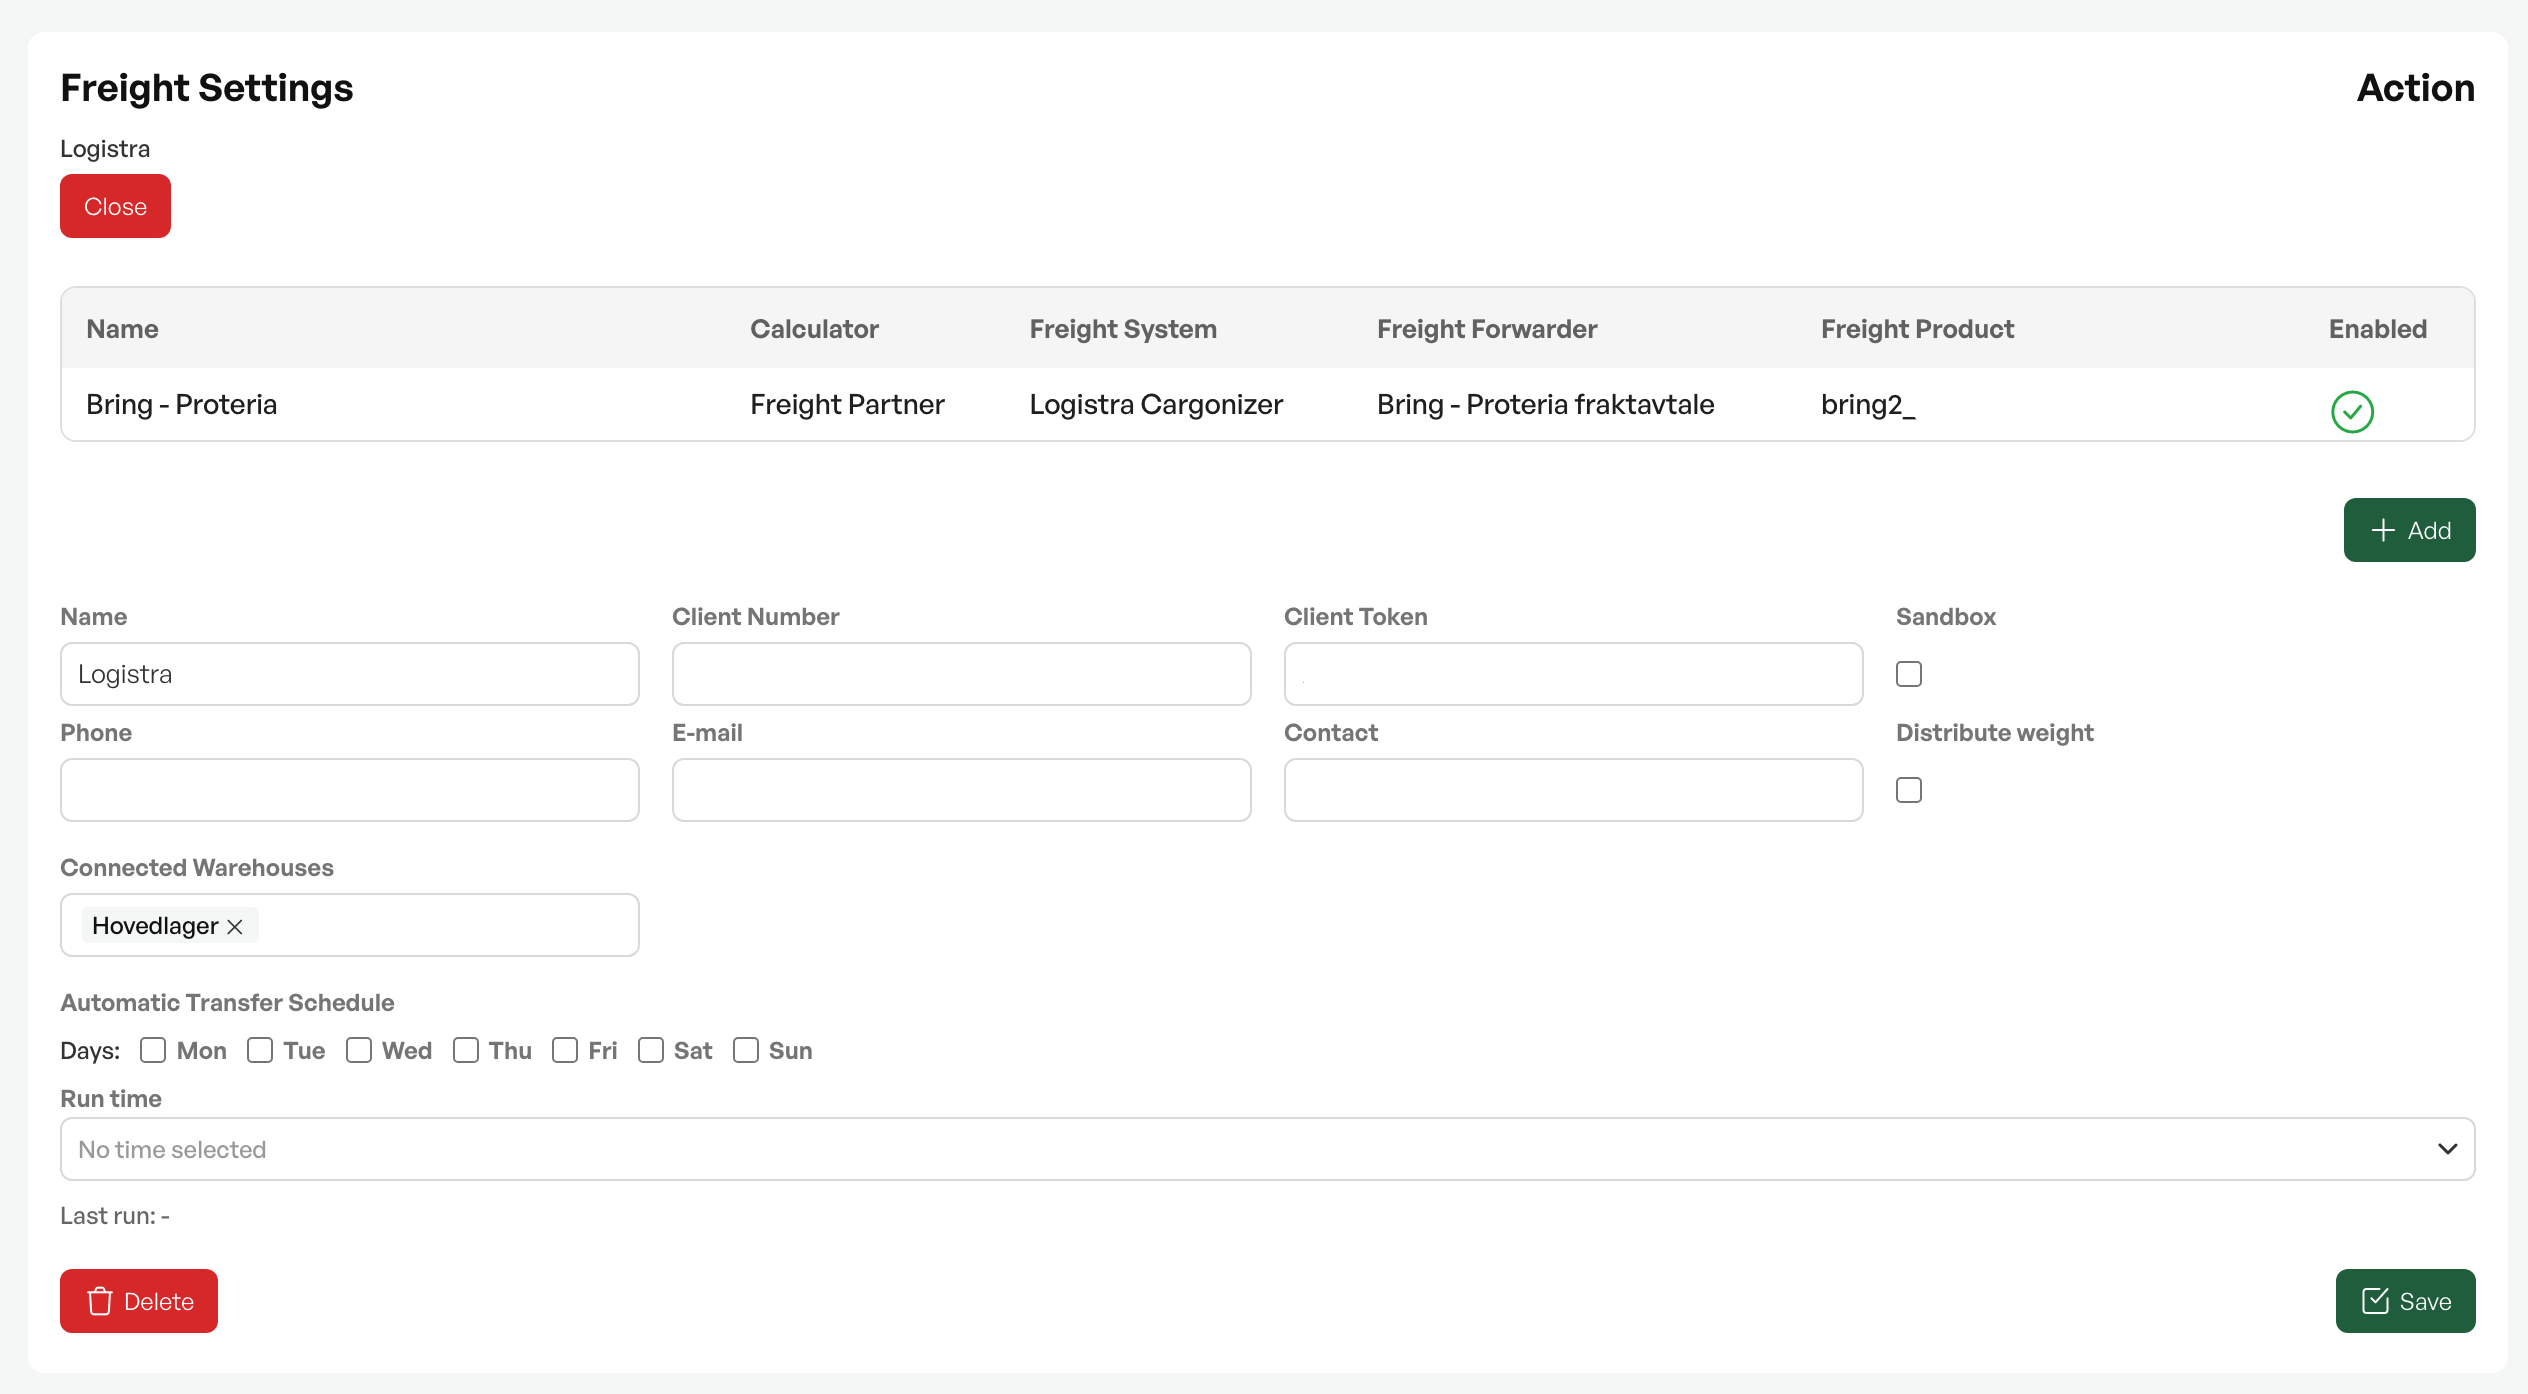
Go to Settings and then System settings, and open the Freight settings tab. Create a new Cargonizer setting and fill in:
1. Name, an optional display name, for example a warehouse or company name.
2. Client Number and Client Token from Cargonizer.
3. Sandbox, which is enabled only for testing. Leave it off in production.
4. Phone, Email and Contact person, which become the default sender information on consignments.
5. Distribute weight, if the total weight should be distributed automatically across all packages.
6. Associated warehouses, which control which warehouses the connection applies to.
Save the setting. If you have several warehouses with different Cargonizer accounts or carrier agreements, create one connection per account and link the relevant warehouses to each.
NB: Requires activation by Telaris. Contact Telaris support.
Printers
If you have label printers connected to Cargonizer, the available printers appear in the freight settings. Choose a default printer per freight product, and the label is sent automatically to the right printer when a consignment is created.
Label printers from Logistra are called DirectPrint and require setup.
Tracking links
Tracking links can be shown in two places, and both require setup. In PDF documents (invoice, quote, order confirmation) you enable the setting to show freight information for the relevant document type. In email you insert the merge code %TRACKINGURL% in the email template, and it is replaced with the tracking links when the email is sent.
Consignments from picking lists
To be able to create consignments from picking lists, Telaris must enable the right mode in the picking list settings:
Single order when the picking list covers one order, or multi-order when it covers several. Without this, no freight button is shown on the picking list.
Automatic EDI transfer
Consignments with status Sent can be transferred automatically to the carrier, so no one needs to click Send EDI manually.
Requires an agreement and setup with Telaris to activate the solution.
NOTE: When automatic EDI is enabled, everything with status Sent is picked up on the next run. Therefore do not export a consignment (New to Sent) before it is actually ready for pickup.
Guidance: Freight types are set up in a separate article, see "Setting up freight types".

Was this article helpful?
That’s Great!
Thank you for your feedback
Sorry! We couldn't be helpful
Thank you for your feedback
Feedback sent
We appreciate your effort and will try to fix the article